This is not mandatory setup if you remember all your routings out of your head. Our setup is quite complex, therefore we advice to do this!
ATTENTION: This is usually the step which is skipped and then you get connection timed out errors and such. Read the guide, it will save our time, your time and you will succeed with the setup!
Audio MIDI Setup.app #
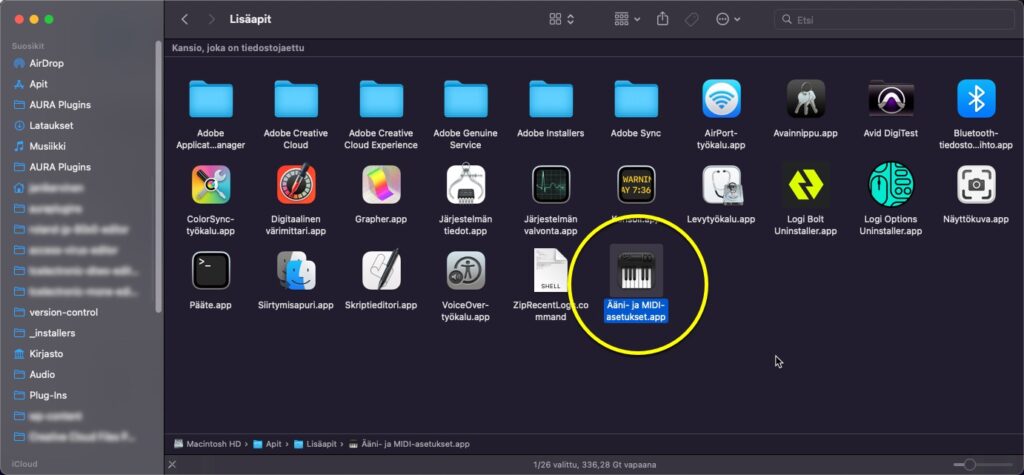
Start by opening Audio MIDI Setup.app [1] – You can find the app from /Applications/Utilities
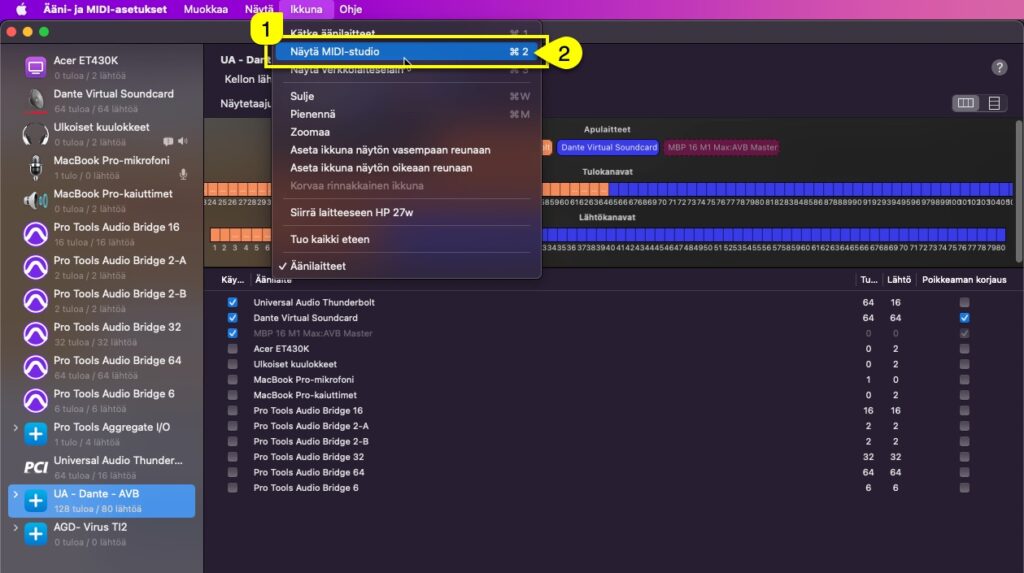
Next we want to view MIDI devices and to do that, click Window [1] and select Show MIDI-Studio [2]
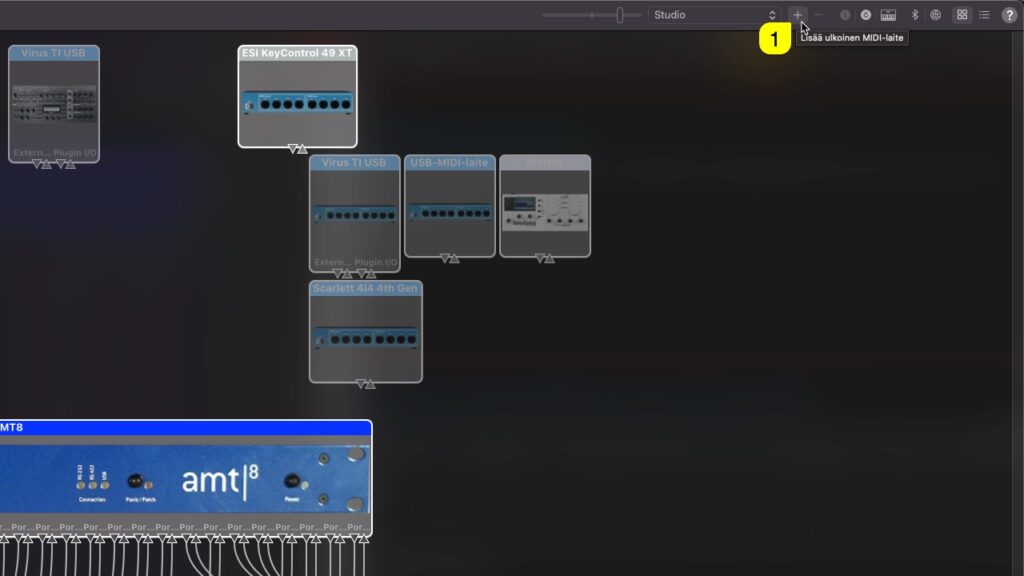
And this is what you get (contents of the window will vary depending what your setup has configured already!):
Creating new Devices #
If you haven’t added the JP-8000 / JP-8080 to your MIDI-studio yet, here is how to do it:
Click + -sign [1] from the top right corner (add external midi-device)
Newly added device will pop somewhere in the window (without any logical placement!)
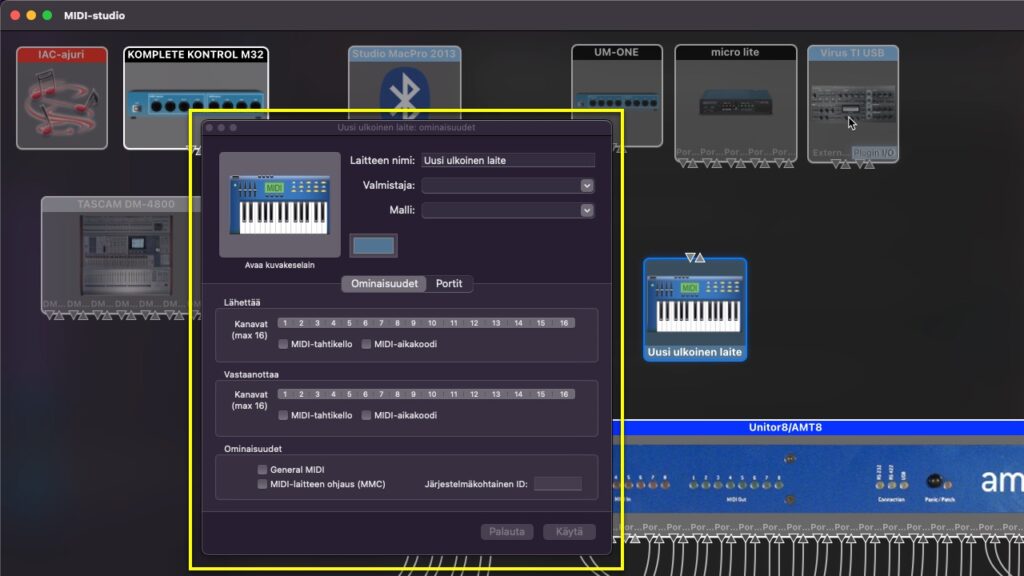
Double click the newly added device so we can start to modify its properties
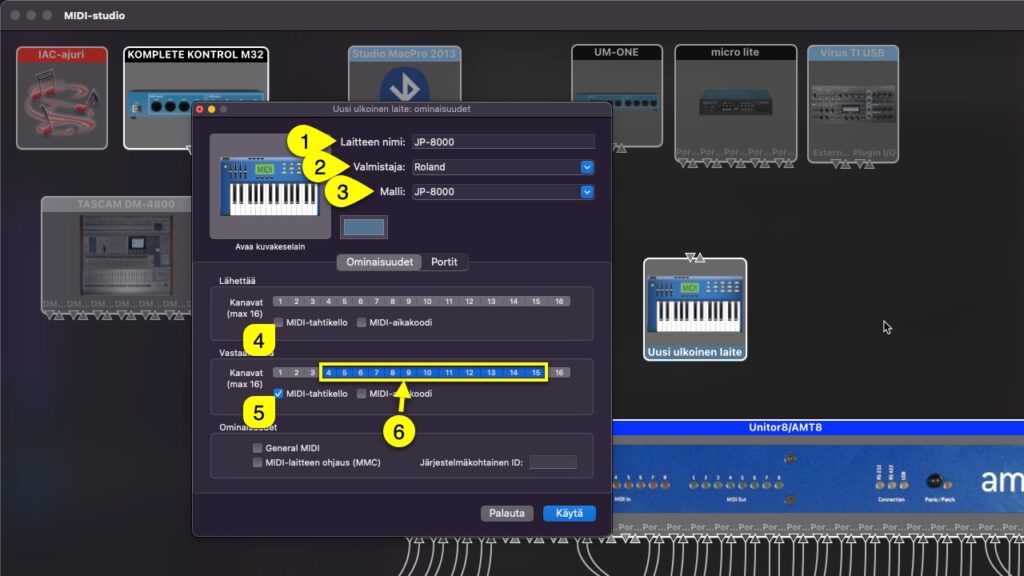
Lets change the Device Name [1] to JP-8000, Manufacturer [2] to Roland and Model [3] to JP-8000. We also uncheck MIDI-clock [4] from transmitting area and check it in receiving side [5]. One more thing we do is we filter out MIDI channels [6] which we know we are not using with this device.
If you have multiple JPs in your setup, add more devices and make sure each of the devices have individual Device Name [1] as set above. Like JP-8000 #1 and JP-8000 #2 etc. This helps later when we connect the hardware to the Editor.
Click APPLY once settings are dialed in!
Connecting Device to MIDI-interface (virtually) #
Making virtual connection within MIDI-studio helps us later down the line when we connect the hardware to the Editor and when we make external connections from DAW to hardware. Some DAWs like Logic Pro can see the Device Name created here in MIDI-studio.
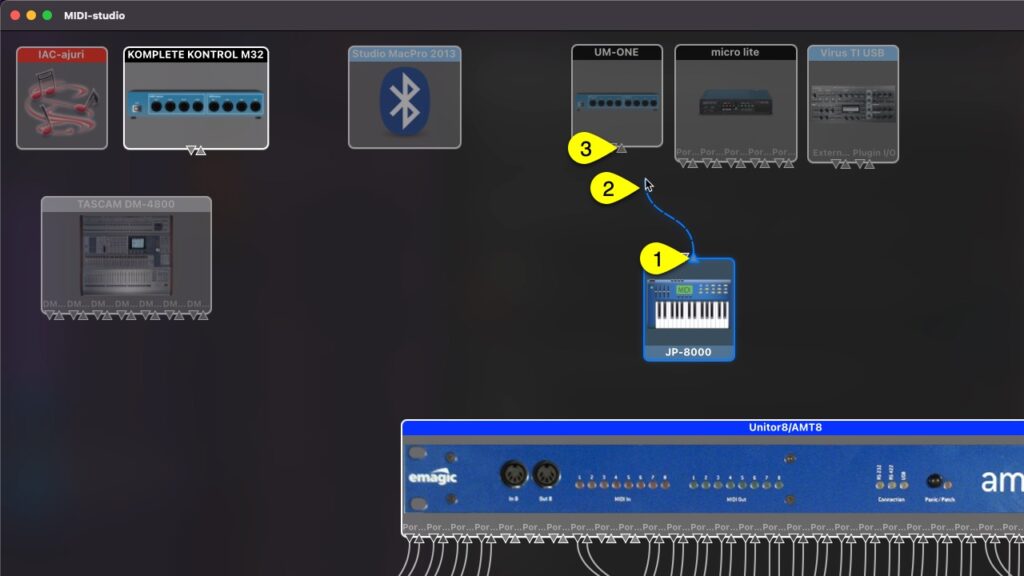
Start by drawing the connection points from your external device output port to your MIDI-interface input port. Click and hold down mouse button from output port [1], start dragging the cable [2] towards your MIDI-interface input port [3].
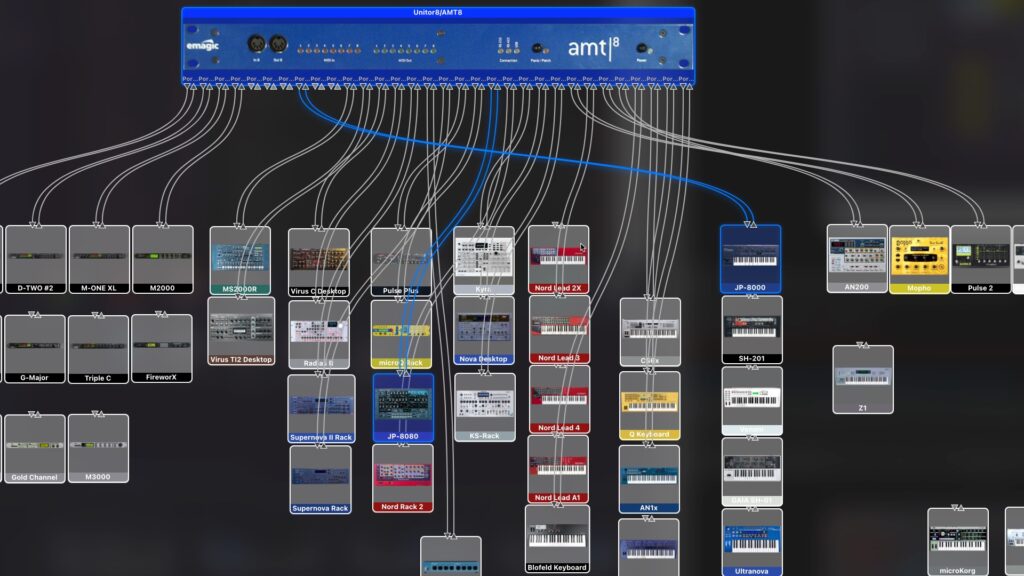
Apply the same procedure for MIDI input port from your device towards your MIDI-interface output port. Final result should have both cables connected as seen below. I have highlighted JP-8080 & JP-8000 and their cables from the spaghetti. (Keep in mind, this is our studio, yours can look a lot different).
These settings are stored within macOS so you don’t have to re-do these settings unless you change your MIDI-interface.

