LAYER SELECT #
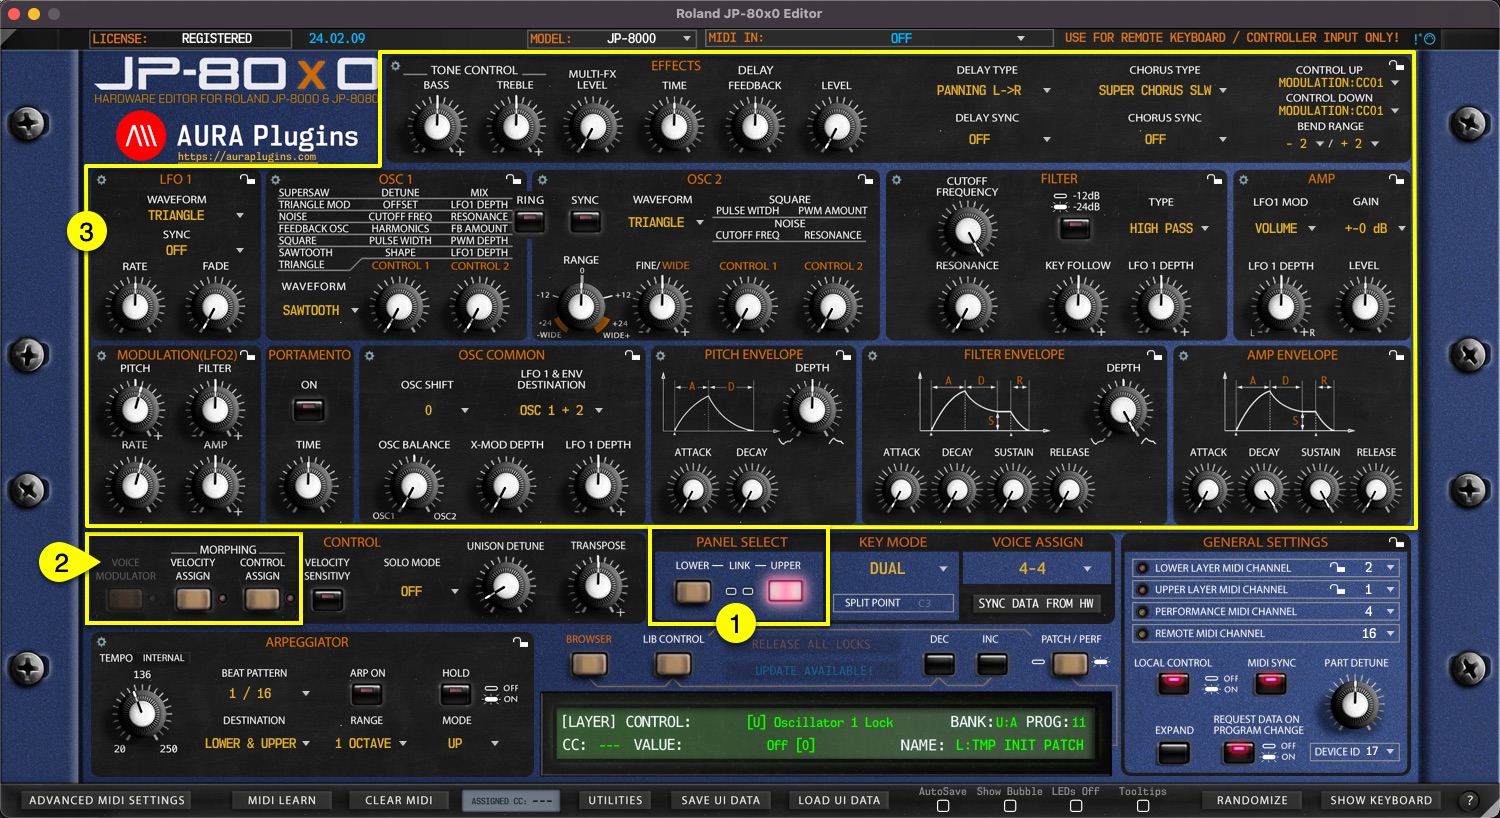
Layer Select [1] is standard feature of the JP, which will change the current Performance Layer of the synthesizer. Data from the Editor user interface will be sent to currently selected layer. i.e., if you move Filter Cutoff 1 from the UI while Upper Layer is selected, then Filter Cutoff in the Upper Layer of the synth will change.
Now, some of you don’t know, but you can have TWO massive supersaw engines in a single JP!
Each layer has its own set of Parameters [3] – These parameters are spread across three different tabs [3]. Also, Browser can handle each layer individually meaning, you have full access to all patches per layer.
Active Layer quick actions menu #
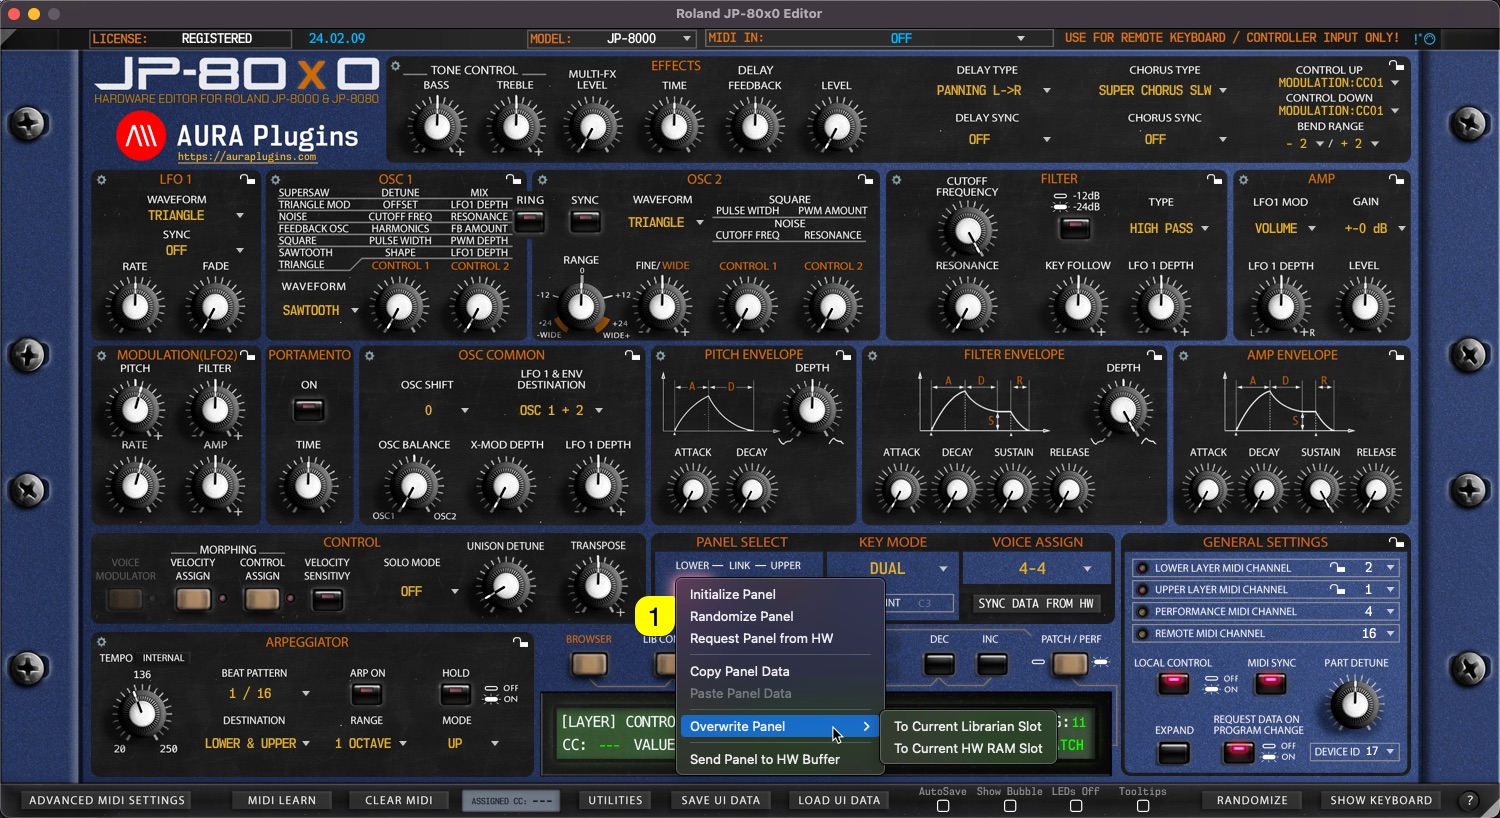
With right mouse click, you can open Layer Quick actions menu for active layer [1]. Most of these are utilities menu items but they are faster to reach right after selecting layer.
VELOCITY ASSIGN LAYER #
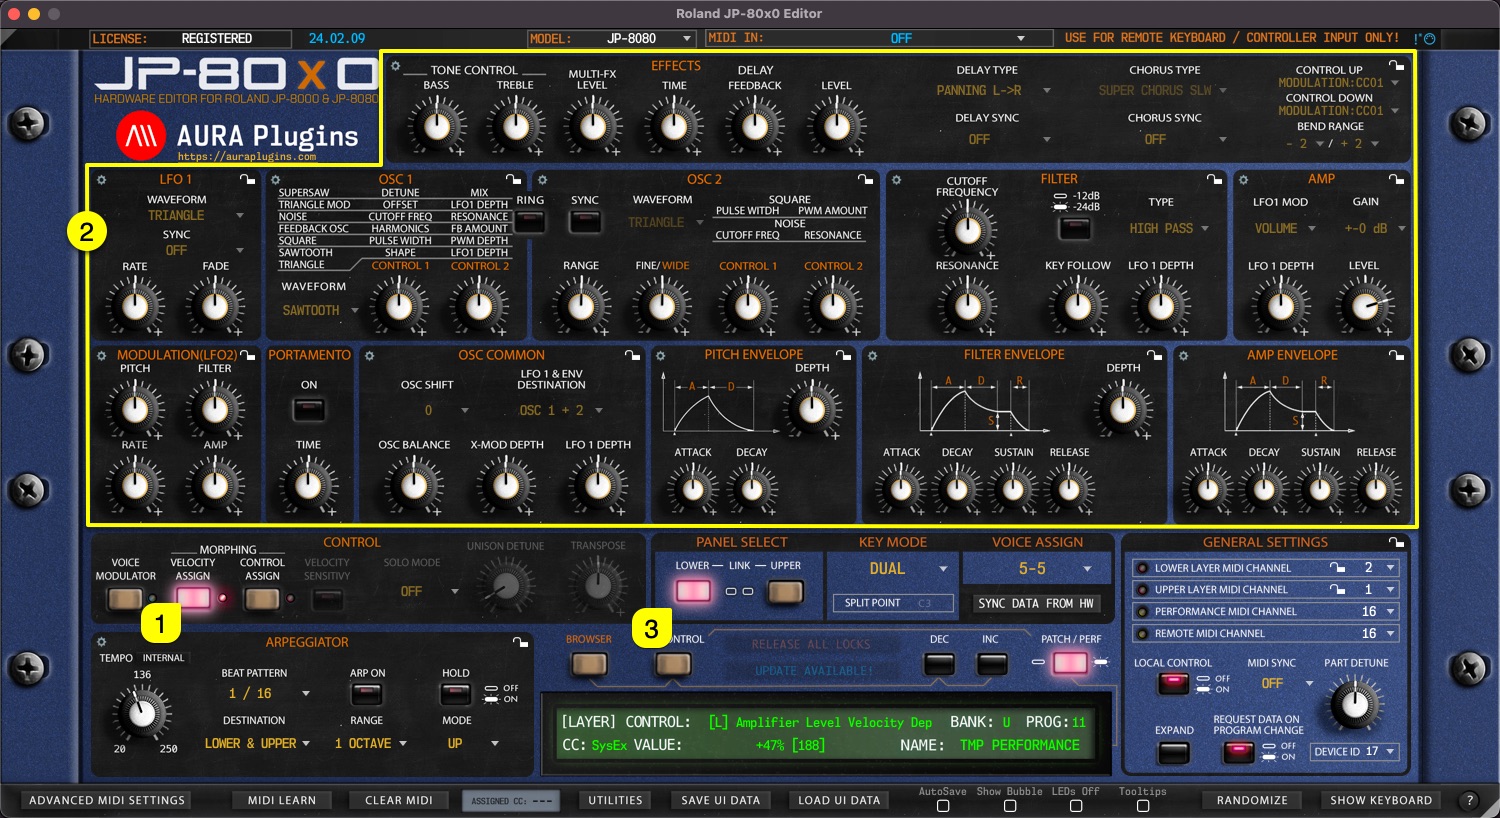
Velocity Assign [1] Layer allows you to set keyboard velocity range per knobs [2], per panel [3]. This means upper and lower layer can have individual Velocity Assignment values to create interesting textures. If layer parameters have Velocity range set, you can see a little red LED being lit up next to the Velocity Assign [1] button.
From this view, you can choose the level of your Velocity amount for knobs which has orange ring on top of the knob. This amount can be negative or positive. When the knob is at 12 o’clock, amount is 0. When you move the knob counterclockwise, you will apply negative amount of sensitivity and when you move the knob clockwise, you will apply positive amount of sensitivity.
CONTROL / RIBBON ASSIGN LAYER #
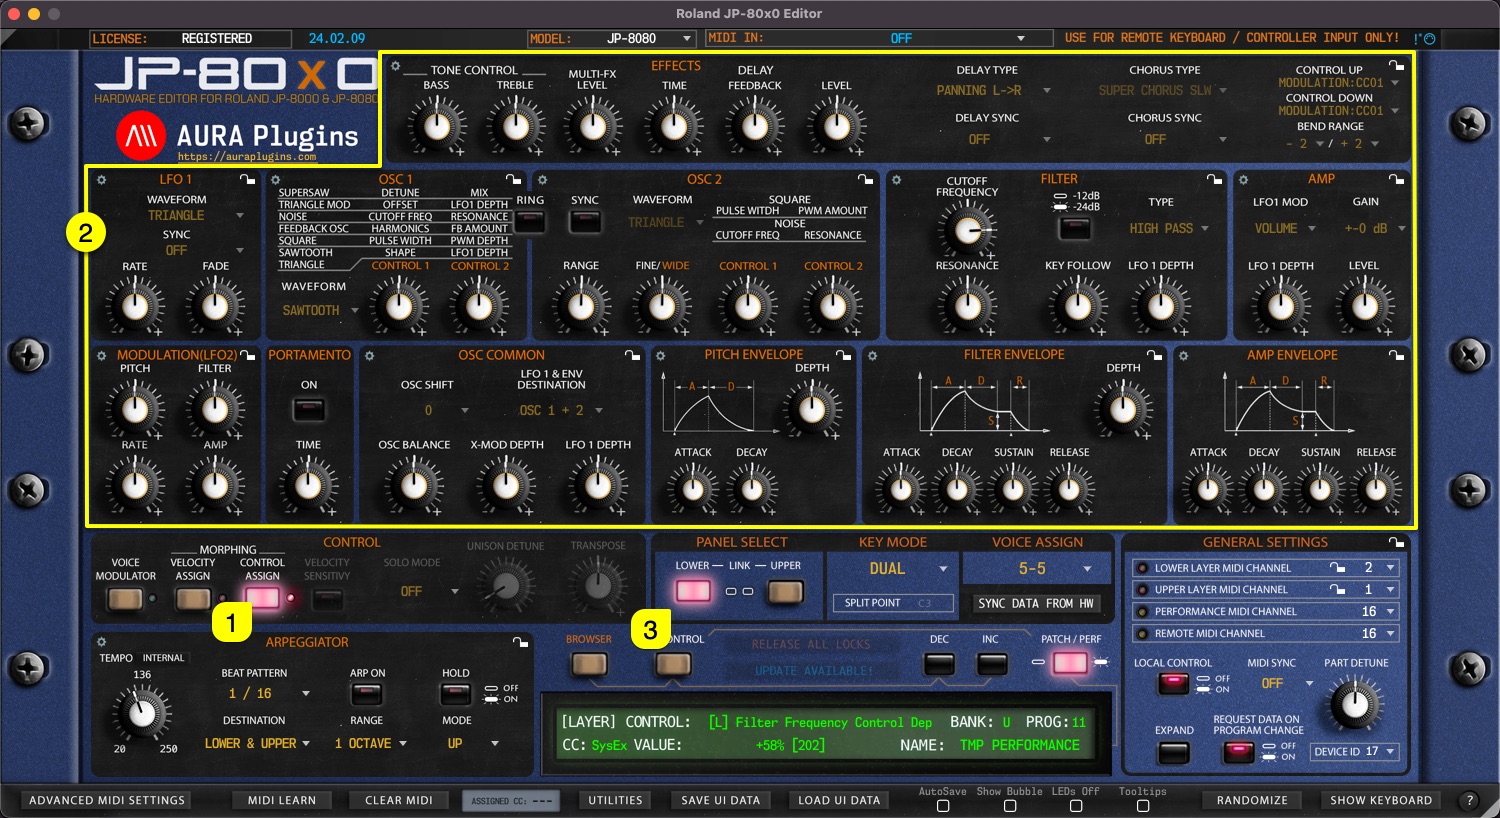
Control Assign [1] Layer allows you to set Mod Wheel / Ribbon range per knobs [2], per panel [3]. This means upper and lower layer can have individual Control Assignment values to create interesting textures. If layer parameters have Control range set, you can see a little red LED being lit up next to the Control Assign [1] button.
From this view, you can choose the level of your Control amount for knobs which has orange ring on top of the knob. This amount can be negative or positive. When the knob is at 12 o’clock, amount is 0. When you move the knob counterclockwise, you will apply negative amount of sensitivity and when you move the knob clockwise, you will apply positive amount of sensitivity.
GLOBAL SETTINGS #
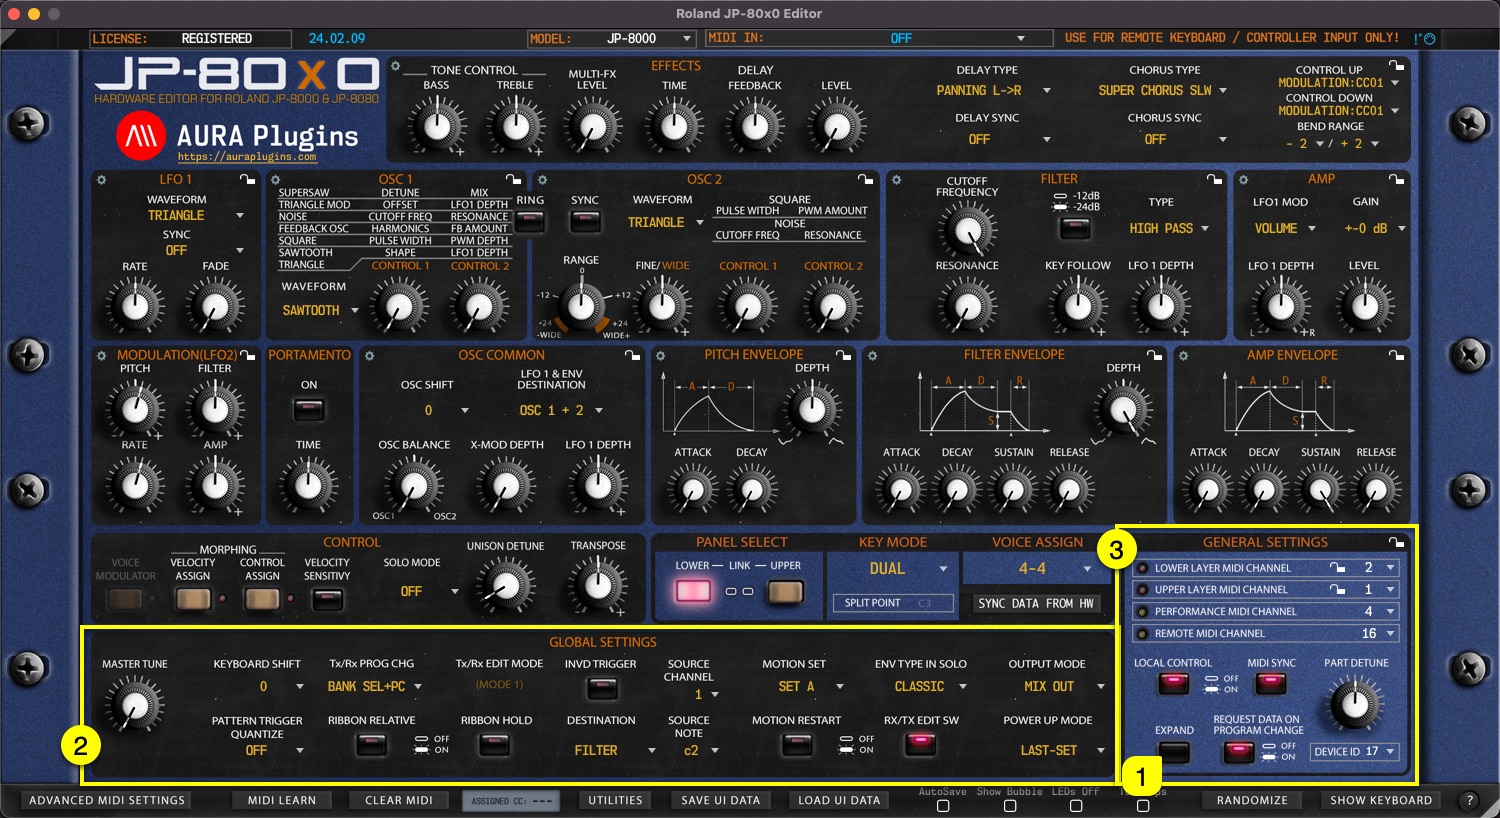
When EXPAND [1] button is toggled on, you can view and modify Global Settings [2]. These settings are additional settings on top of General Settings [3] which are mainly for Performance Control.

