DISCLAIMER
Our company & product has nothing to do with Ableton AG.
If there is an issue with our product, open a support ticket in your account page.
You can find support details at the end of this document.
Support and updates are free to anyone who has bought the license from our store
Audio Configuration #
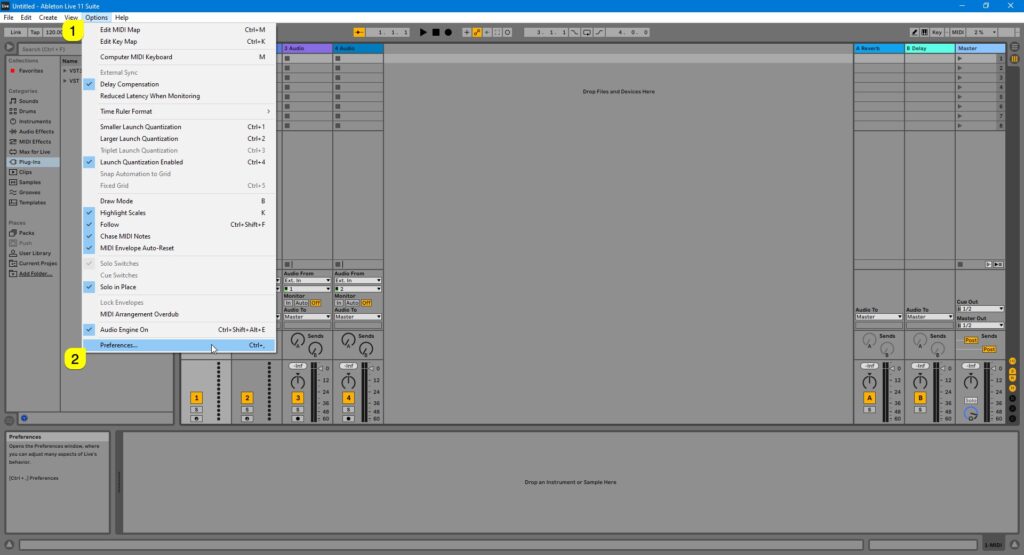
First, open Ableton Live, click Options [1] from the top bar and select Preferences… [2] – We are making adjustments to Audio and MIDI settings which are crucial for our Editor to work flawless.
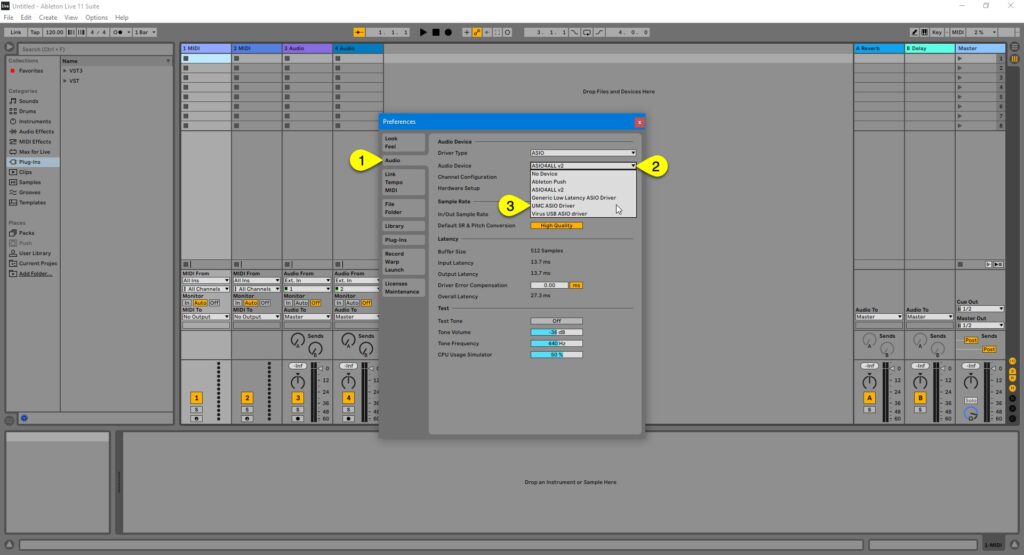
Open Audio [1] tab and select your Audio device [2] you use for your setup (if not set already). We are going to use UMC ASIO Driver [3].
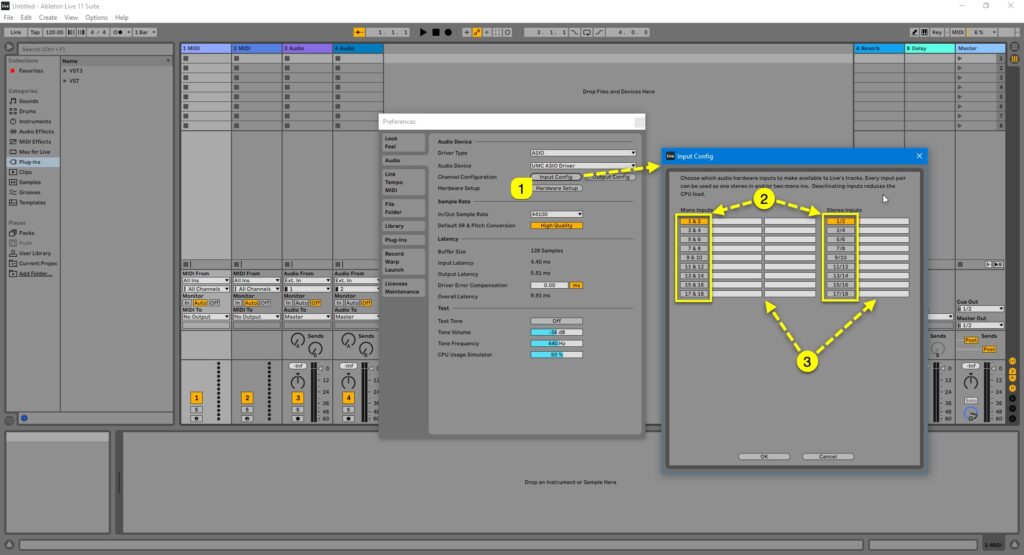
After Audio engine is initialized, click Input Config [1]. Enable input ports [2] you use with your setup and rename ports [3] as they are routed.
Our input ports [1] are now renamed accordingly. Click OK [2] to close input config.
MIDI Configuration #
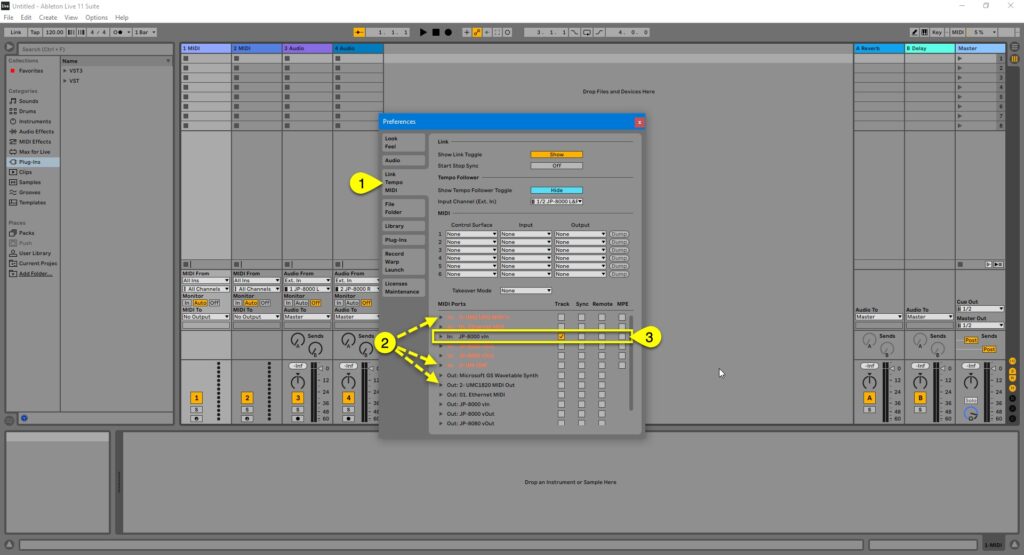
Next we want to adjust MIDI ports and how they are shown in Live. Click on LINK / TEMPO / MIDI [1] to open it. Check and make sure all the physical MIDI ports [2] are disabled from MIDI section.
Now you can Enable Roland JP-8000 vIn [3] to trigger other VSTs in your session (if JP-8000 is used as your master keyboard).
ATTENTION: Our Editor uses DIRECT connection from MIDI interface to the hardware. Therefore the hardware ports need to be disabled from the DAW settings!
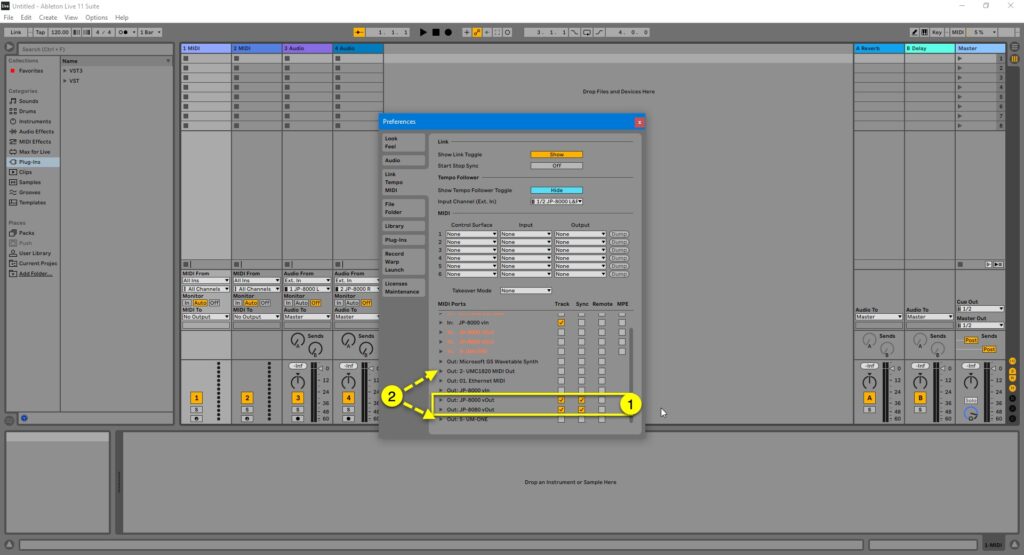
While we are at it, lets enable virtual ports [1] created in loopMIDI / MIDI-OX guide. When you use the virtual ports on MIDI tracks, you get tight DAW timing. Note that physical MIDI ports [2] are unchecked so that we can use them with the Editor.
Check “tracking” and “sync” for the JP virtual output ports. With sync toggled on, you can pass MIDI clock information from DAW to your hardware which is used when LFOs or Effects are clocked to incoming MIDI clock status.
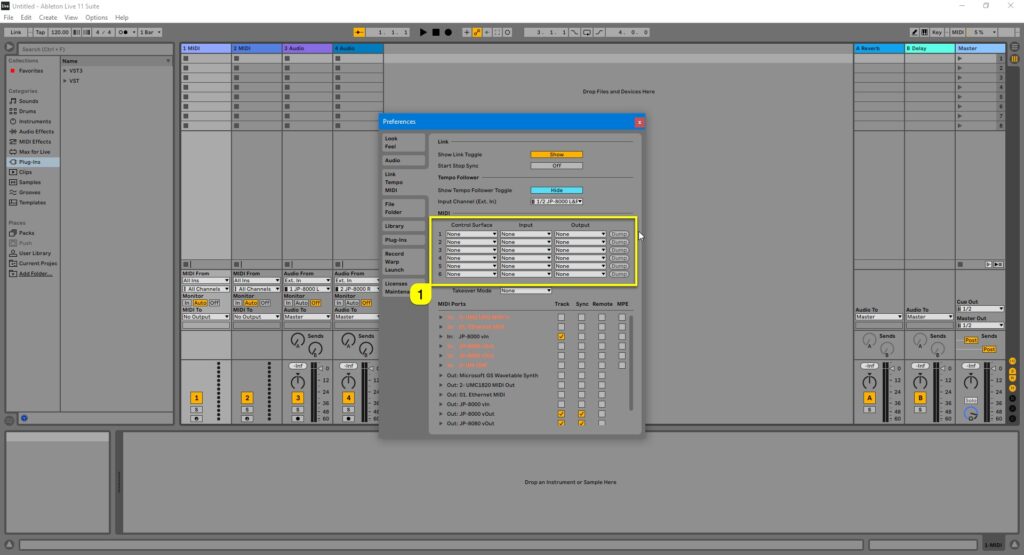
Before we are all done, make sure the physical ports which are used to connect with JP are not used within the Control Surfaces [1] section!
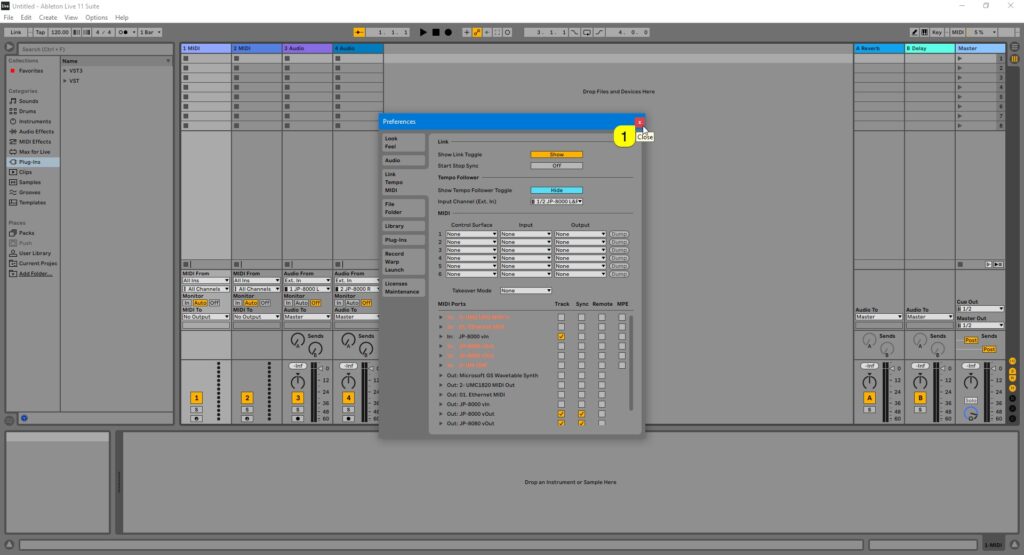
Now can click close [1] to exit preferences.

