Before we add the Editor to the session, lets one AUDIO track and three MIDI tracks for the JP.
Creating Audio track(s) #
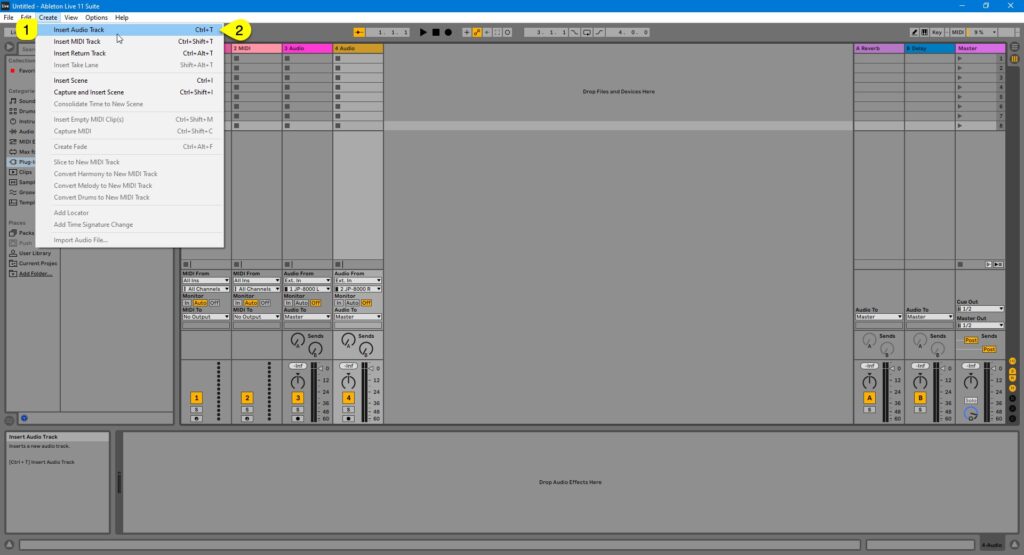
Click Create [1] and select Insert Audio Track [2] to create Audio track or use Ctrl+T key combination.
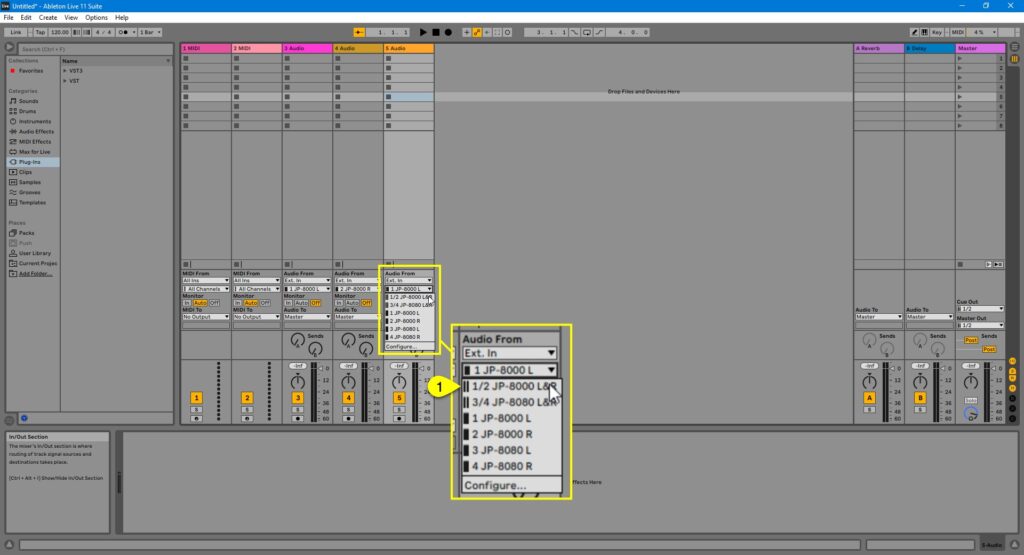
Assign input [1] accordingly so that you get the JP signal into Live.
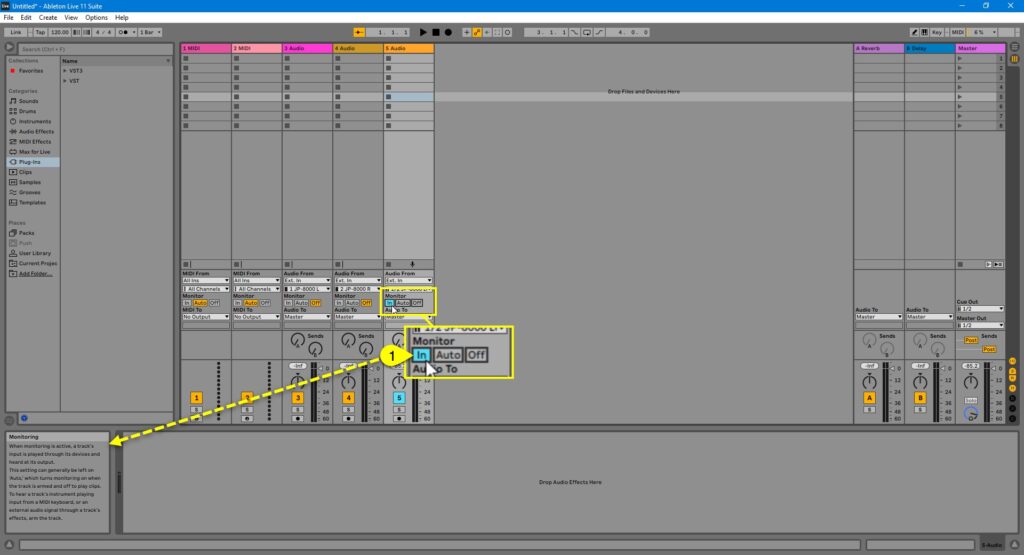
Now you can enable Input Monitoring [1] to hear the JP via Live. If you play any keys and you have your inputs configured properly, you should get Audio in!
Creating MIDI tracks #
Now we are ready to create MIDI tracks which we are going to use for making sequences
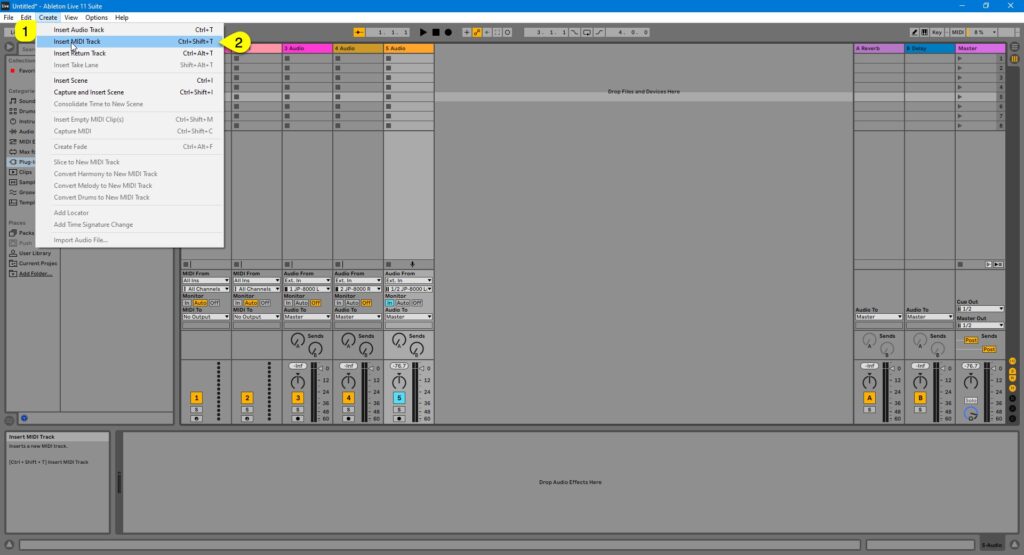
Click Create [1] and select Insert MIDI Track [2] to create MIDI tracks or use Ctrl+Shift+T key combination. Repeat so that you get 3 new MIDI tracks!
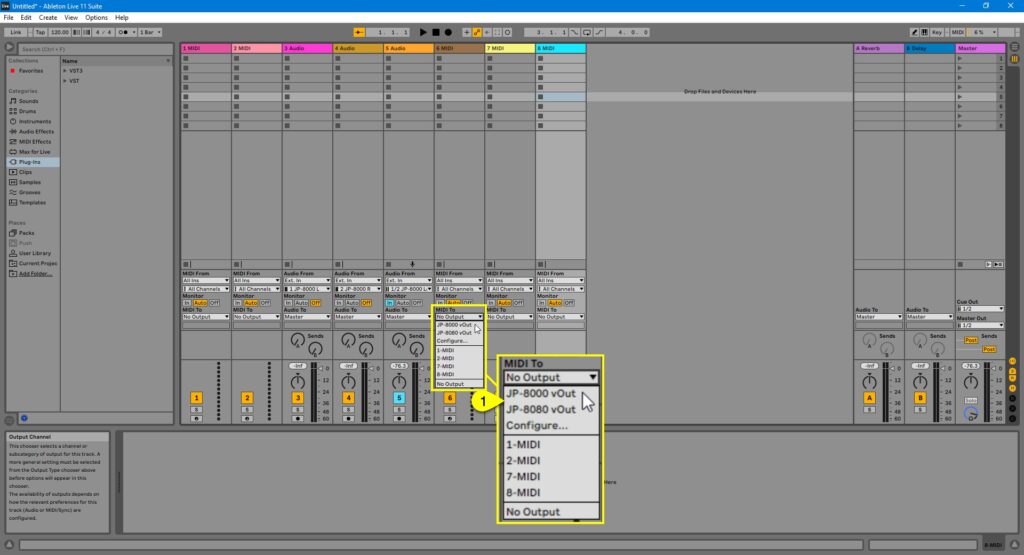
Assign MIDI output port to virtual JP port [1] for all three MIDI tracks just created.
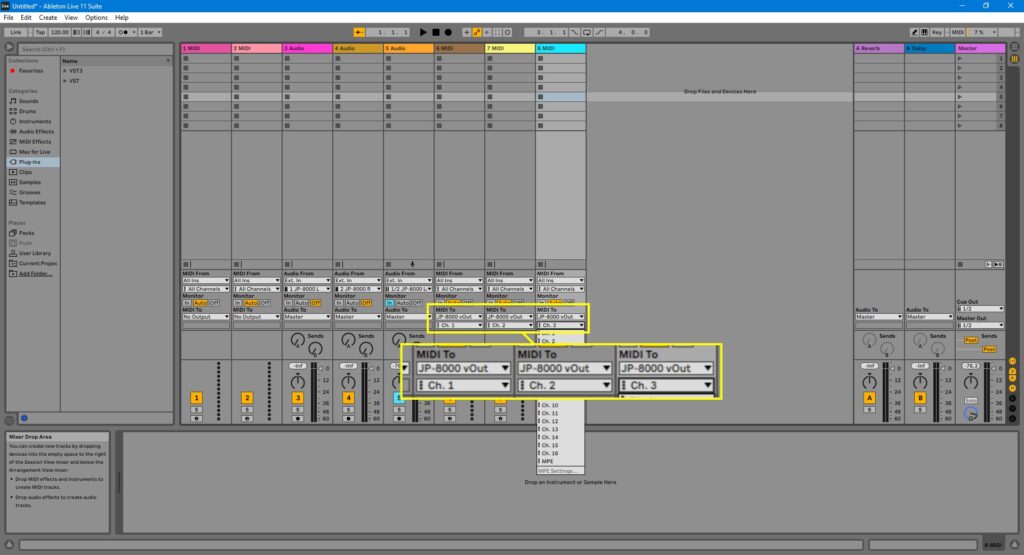
Assign MIDI channels so that first MIDI track sends to channel 1, second to 2 and third to 3.
Renaming tracks for clarity #
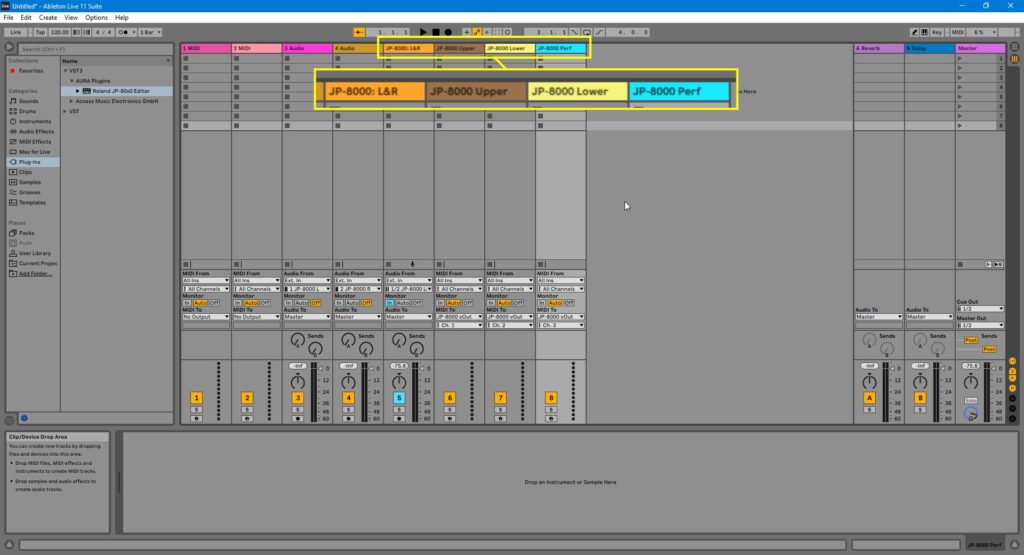
To finalize this part of configuration, rename tracks as you prefer. Here is a screenshot how we’ve done it
Now we are ready to add the Editor (finally huh?!)

