VST2 (legacy) #
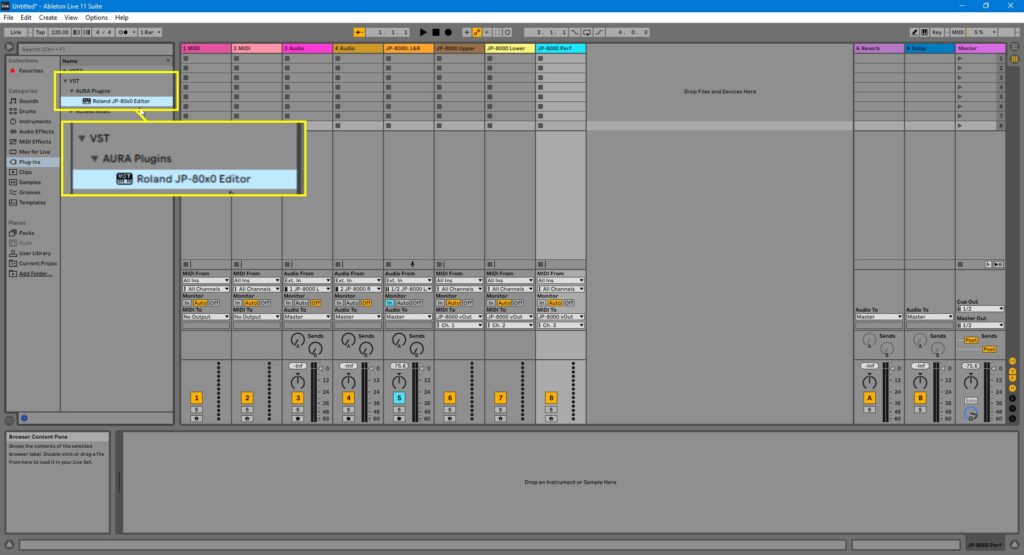
You have the option to use the legacy VST2 format if you so wish to do. We would recommend to use VST3 for parameter automation simplicity and it has modern SDK (developer framework) under the hood.
You can find the VST2 version from VST -> AURA Plugins folder.
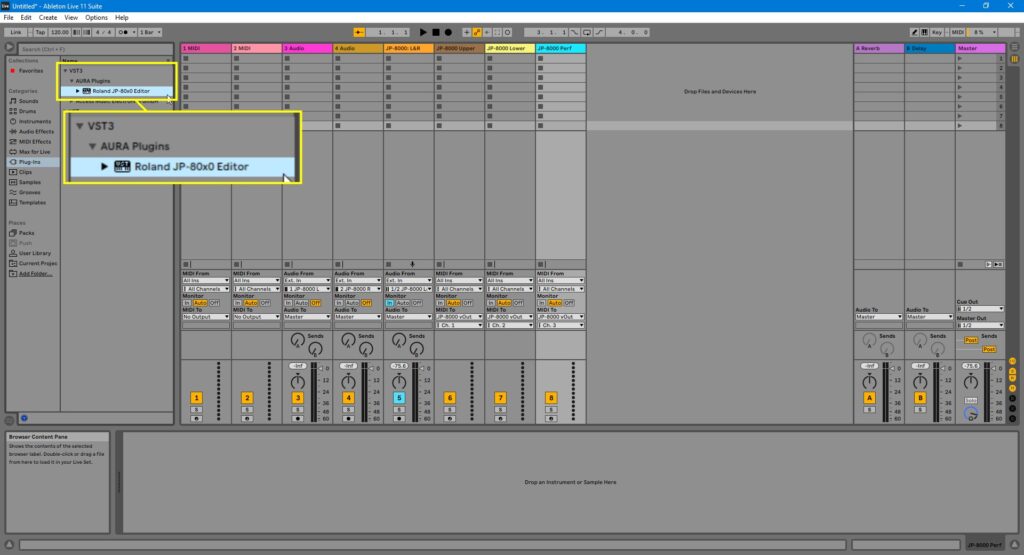
VST3 #
You can find the VST3 version from VST3 -> AURA Plugins folder. In this guide, we are using VST3
Insert the plug-in to Empty track #
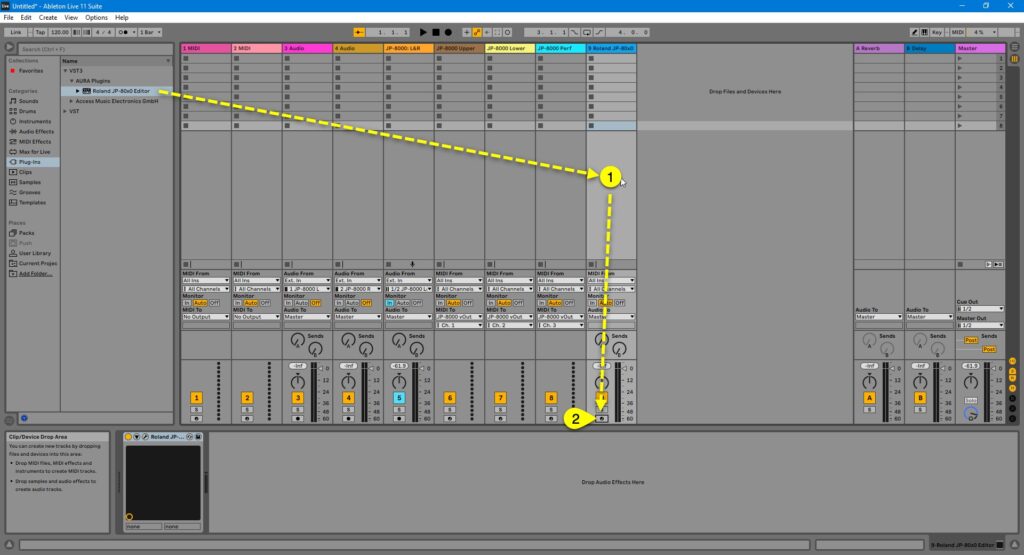
Drag the Editor to empty area [1] in your Live tracks view. Before you rush to open the Editor User Interface, DISABLE track arm [2] toggle while setting the MIDI ports!
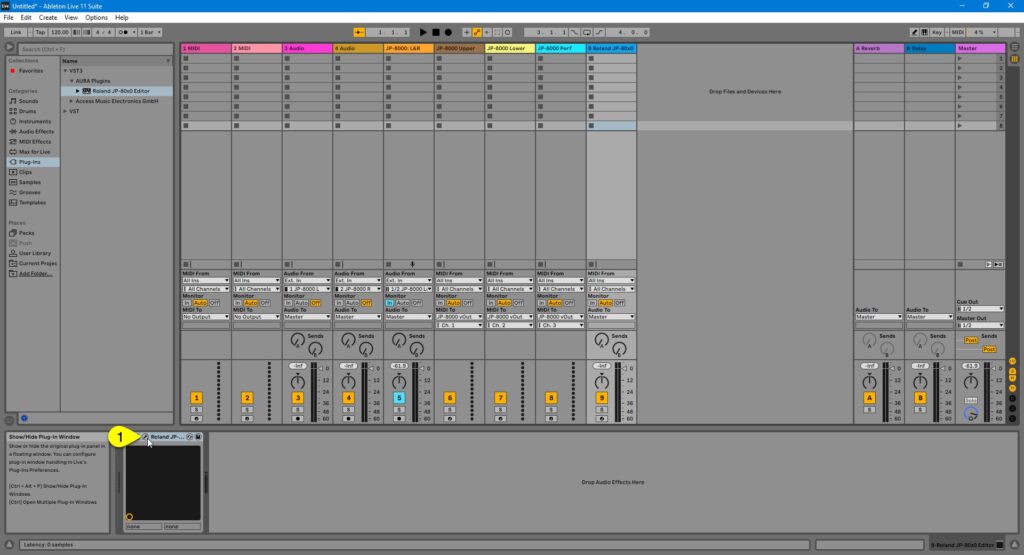
Now you can open the Editor User Interface by clicking the wrench [1] icon in Live.
Device ID check #
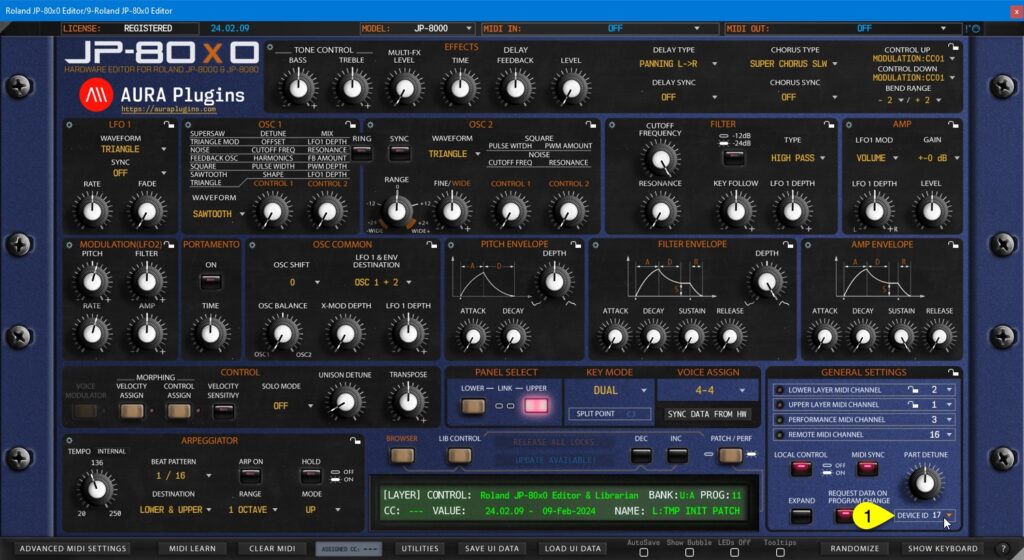
First we have to match the Editor Device ID with what you’ve set in your JP. In our case it is 17. You can check how yours is set from JP-8000 or JP-8080 Config guide if you skipped that part.
MIDI Input and MIDI Output ports #
MIDI Input #
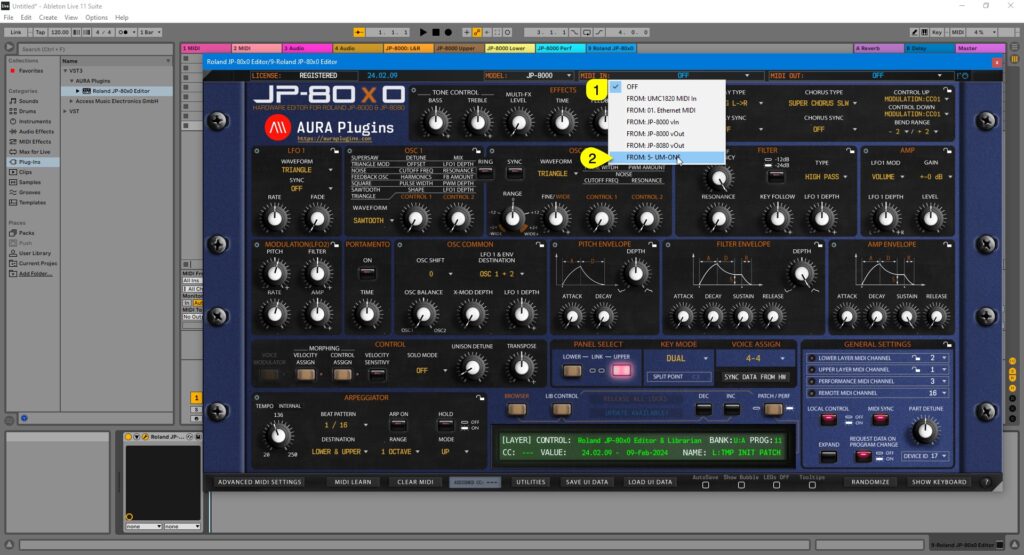
Click MIDI IN [1] area to view which MIDI ports are available. Select the MIDI input port where your JP MIDI Out is connected into. In our case, we have the JP-8000 connected in UM-ONE port [2].
MIDI Output #
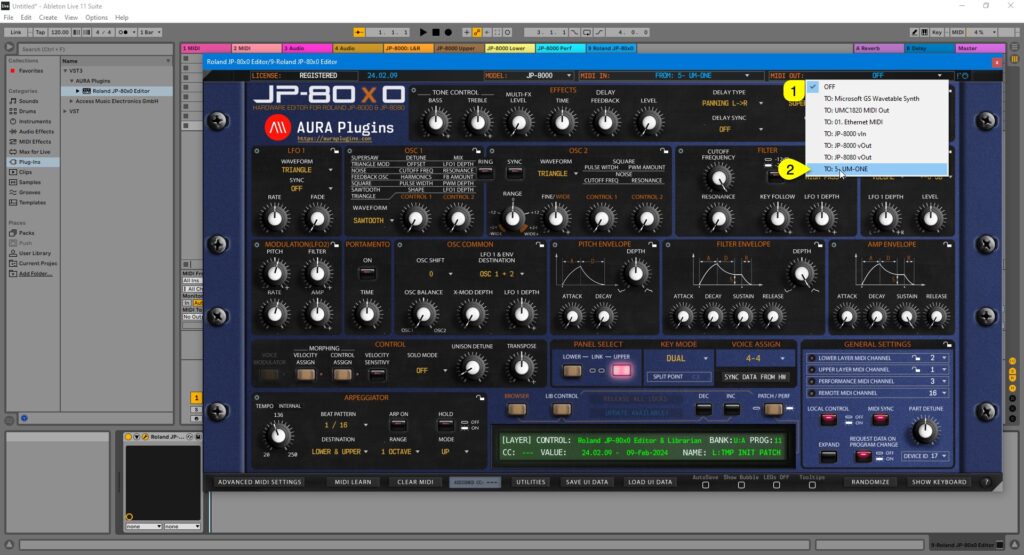
Click MIDI OUT [1] area to view which MIDI ports are available. Select the MIDI output port which is connected to your JP MIDI input. In our case, we have JP-8000 connected to UM-ONE port [2].
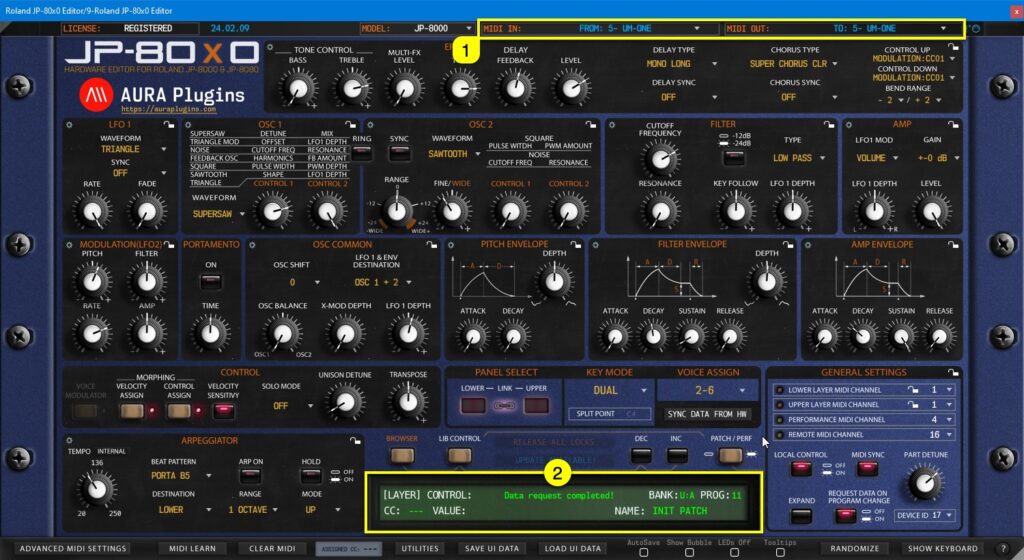
Once you set the MIDI output port, our Editor will make a ping / request call to the hardware unit. If MIDI ports [1] are properly set, Editor display [2] will say “Data request completed!” or “Click Sync Data from HW to continue”.
Check Main Functions and Libarian guides to learn more about the Editor usage.

